Be Prepared for Common Winter Homeowners Insurance Claims

Preparing for Winter

As we mentioned, the winter is a busy season for insurance agents due to the spike in claims. But what kind of issues are homeowners experiencing the most this time of year? Here are some examples.

Roof Damage

Most of us don’t pay too much attention to our roofs until they are caving in on us. The added weight of ice and snow can lead to a collapse if you’re not careful. Even if the worst doesn’t happen, it is possible to have to replace some  roofing.  Make sure your roof is in good condition before winter storms occur.

Fallen Trees

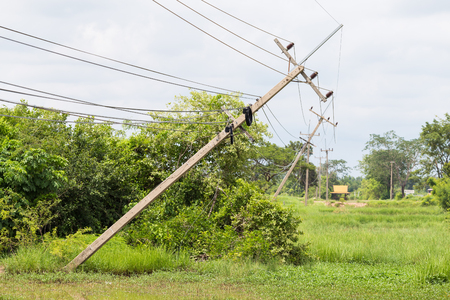
Branches and tree trunks can drop onto your house with little warning or notice, and the results can be devastating. Although you can’t always prepare yourself for this kind of occurrence, you can remove any old or decaying branches before the first snow falls. Look for any trees that may be leaning toward or over your house.  Talk with a professional about possible solutions.

Burst Pipes

The pipes inside our homes are not always built to withstand such temperature variations, which means that they could crack or burst if you’re not careful. Improper insulation and installation is usually the culprit, and the results could be a flooded home. Be sure that all pipes all insulated properly, and you might consider using spigot covers during cold months.

Fire Damage

As we mentioned in Preparing Your Home for Winter, your chimney could be a hazard if you don’t get it cleaned. When burning wood in your fireplace, use a fender (a short and long piece of metal that sits on the hearth to protect the rug or floor from flying sparks) and a firescreen.  If you are using  a space heater, leave plenty of area around the heater and be sure there are no flammable objects near it.

Are You Covered?

Before winter hits, do an insurance review with your agent to ensure that you’re covered from things like falling branches, “acts of God,” as well as other potential damages. You don’t want to wait until a pipe bursts to find out that you’re not covered for such things. Even if you’ve gone years without such a claim, you never know what the future holds. An insurance review could save you thousands of dollars.

Call 265-922-3111 or use our contact form to schedule your insurance review.


Preparing For Winter Series

Preparing Your Home for Winter

Preparing for Winter

Since your house may get covered in snow and ice, you want to be sure that the severe weather isn’t going to breach the inside, nor leave behind lasting damage that will have to be repaired. Although you can’t prevent any and all kinds of problems from occurring, you can avoid many common issues that plague homeowners this time of year.

When it comes to protecting your home from the harsh winter weather, your primary goal is to make sure that the cold stays outside where it belongs. Also, you want to keep an eye on parts of your home that are exposed to the elements, including the roof, windows, and gutters.

Keep in mind that this list is not comprehensive, but it should give you an idea of what to think about to get your home ready this winter.

Clean Your Gutters

If leaves and water are sitting in your gutters during the cold season, they could freeze over and cause damage to the gutter itself. In addition, if they get too heavy from an abundance of ice and snow, they could buckle and damage your roof in the process.

Overall, you want to keep them as clear as possible so that when the snows arrive, they aren’t adding to a bunch of gunk that is already there. One thing to remember is that it’s best to wait until there are no more leaves dropping so that you only have to do this once.

Repair Cracks

As water freezes inside these cracks, the ice will expand, widening and deepening the damage. Over time, a little break can turn into a fault line, which can put your home at risk. Ideally, you will work on cracks on both the pavement surrounding your home as well as any masonry that is on the outside (i.e., the chimney).

If your foundation is starting to crack, it’s imperative that you patch it up ASAP. If you let it go too long, then it could spell disaster for your house and lead to significant damage.

Inspect Your Heating System

Depending on where you live, you likely don’t have to use your heater until the weather gets colder. This means that it sits unused for months on end, which can lead to inefficient operation when the time comes.

As such, you want to get all of your machinery inspected before the temperatures drop so that you can improve your energy and heating bills and ensure that it won’t break down when it counts the most.

Reverse Ceiling Fans

This is a minor step, but it can have significant effects. By reversing the flow of the fan blades, you’re moving hot air up and around the home more efficiently, which can help you save some money on heating bills. Also, it enables you to use them all year long since you don’t have to worry about the fan cooling you down when it’s already freezing outside.

Clean Your Chimney

Unless you have a gas fireplace, chances are that your chimney needs some cleaning before you start putting wood inside. Many house fires are started from flammable material that wasn’t removed, so don’t put yourself at risk. If necessary, hire a professional to inspect and clean the inside thoroughly.


Preparing For Winter Series

Simple Changes to Lower Your Heating Bill

Simple Changes to Lower Your Heating Bill

The weather is starting to cool down, which means that we are bundling up and turning the heat on. If you are like us, then you love staying warm in the fall and winter, but who likes seeing their heating bill go up? We don’t, and you probably don’t either.

Did you know that there are some simple and effective changes that you can make around your home to lower your heating bill? Let’s take a look at some easy ways that you can save energy and money on your bills.

Insulate

If you haven’t checked the insulation in your attic, that should be one of the first things that you do. Warm air rises, and when you turn on the heat, where do you think it wants to travel? Right up through your attic.

Go up in your attic and make sure that it is well insulated so that you aren’t losing valuable heat through the ceiling and the roof. Adding insulation will keep more hot air in your house, so your heater doesn’t have to work as hard to maintain the temperature.

Seal the Cracks

This is especially helpful if you live in a house that is older and if you haven’t had your windows replaced in a while. Go around the edges of your windows and doors to see where you may have cool air seeping into your house. If it is around your windows, use a little caulk to seal up the cracks to keep warm air in and keep cold air out.

If you have prominent cracks underneath your doorways that lead to the outside, you can grab sliders that fit just underneath your doorway so that you can keep the cold air out of your home. It is easy for cold air to sneak in under your doorway, so make sure that you are using some kind of padding or matting to block the warm air in.

Schedule Your Thermostat

If you are leaving your thermostat on high 24 hours a day, you are wasting a lot of money and energy. Turn your thermostat down anytime you and your family are out of the house. If you have a smart thermostat, set it to lower during the times of day that you are out of the house.

Bundle Up

You don’t have to keep your heater running on high when you are in your house. You can save a significant amount of money by just making the choice to bundle up more when you are at home. Throw on some sweatpants and a sweatshirt when you’re home so that you can let your heater rest a little. You can even throw on some more blankets at night when you are asleep to save on heating costs.

Tips for Handling Power Outages

Tips for Handling Power Outages

If you are not already prepared for the event of a power outage, it is something that we highly recommend. Power outages can occur for a number of reasons and can happen anytime, without warning. We recommend that you have a list of materials ready in the event that you have a power outage, and an action plan put in place in the event of a power outage.

Preparing for An Outage

Make Sure Your Devices are Charge

This one is pretty simple, make sure that your cell phone, laptops and other electronic devices are fully charged at all times.

Have Backup Batteries

You may want to make sure that you have some backup chargers and portable batteries that you can use to charge your devices in the event of a power outage.

Have a Generator

Having a backup generator is critical in the event of a long term power outage. Make sure to speak with an expert about what size you need for your home.

Get a Cooler

Coolers are always handy in the event of an outage. Make sure that you have a reliable cooler that can keep your food cool for six to seven days, in the event of a long term power outage.

Have Ice Bags or Packs Stocked

To accompany the cooler, make sure that you either have a bag of ice in your freezer or individual ice packs that you can use in your cooler to keep your food cold.

Keep Your Gas Tank Full

In case the outage is widespread, make sure that you always keep a full tank of gas in your vehicles. This can come in handy in the event of an emergency.

Know How to Manually Open Your Garage

If your cars are parked in your garage and the power goes out, make sure that you know how to manually open your garage doors.

During an Outage

Here are some pointers that you can use during an outage.

Use Flashlights

Use flashlights instead of candles to prevent a fire from occurring.

Keep your Refrigerator and Freezer Closed

Keep your refrigerator and freezer closed when you aren’t using them to keep your food and drinks cold.

Go Somewhere Cool

If it is hot, go somewhere cool like a movie theater or find a shelter.

Keep Warm When it is Cold

If it is cold outside, layer up so that you can stay warm.

Disconnect Appliances & Electronics

Make sure to disconnect any of your appliances to avoid a surge when the power comes back on.  If any of your electronics are not protected by a surge protector, unplug them as well.


Although a power outage is many times a temporary inconvenience, other types of damage to your home is not. Homeowner’s insurance helps protect in case you experience loss or damage to your home or property.  If you’d like, call us at 865-922-3111 (local) or 800-624-3339 (toll free) or click here to contact us.  Our staff are trained to help you make the best choice to protect your home and property.

5 Tips to Keep Your Home Safe this Halloween

Home Safety Tips for Halloween

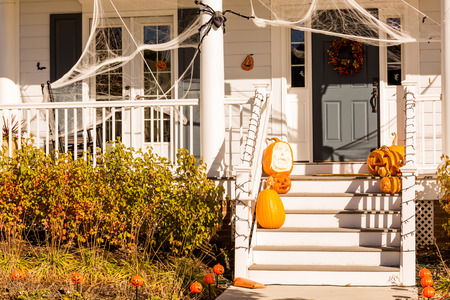
Halloween kicks off the holiday season with festive and “spooky” decorations, fun costumes and treats galore. But with fun and festivities come increased risks around your home that can ruin what is meant to be an enjoyable holiday.

The good news is, you can avoid the risks with these simple Halloween home safety tips.

Keep your porch well-lit and clutter free

If you plan to hand out candy to trick-or-treaters on Halloween, be sure the walkway to your porch is free from cords, ropes, and other clutter that can could easily trip a young ghost or goblin.

Make sure that you keep your walkway and porch well-lit so visitors can see and avoid tripping on flower pots and any decorations or debris.  Turning on your porch light and adding additional lights, if needed, can help you avoid any accidents.

Be careful with open flames

Festive decorations can be one of the most enjoyable things about Halloween, but can also pose risks.  Candles with an open flame can be a fire hazard in your home. Keep paper decorations far away from candles. If you put candles in your carved pumpkins, do not leave them unattended.

Keep pets away from trick-or-treaters

Your furry friends may want to join in the fun of greeting trick-or-treaters at the door, but it’s best to confine them away from young strangers in costumes.  While your pet may be very friendly, the excitement of having the doorbell ring frequently and having youngsters reaching out for candy, could stress your pet and cause them to jump or even bite.  Avoid this situation by keeping Fido away from the front door.

Keep your Decorations and Gags Safe

If you plan to dress up your yard with Halloween decorations, make sure they are not sharp, dangerous in any way, or meant to alarm anyone who visits your home.  Decorations are meant to be fun, so make sure they are just that!

Keep Halloween a fun and festive night for you and your neighbors!

By following a few, simple Halloween home safety tips, you can enjoy the spirit of the season while avoiding unnecessary risks and expense. Keep your home safe for your family and your trick-or-treaters!


Grilling Safety Part 4: Flavoring your Food with Wood

Grilling Safety Part 4: Woods to Use for Flavoring

Sometimes safety is about using the right materials rather than less desirable choices. When it comes to using wood to help flavor the food, make sure that you choose the right one.

There are many types of woods available for grilling or smoking food.  Here are some tips regarding your wood choices.

  • Softwoods burn quickly and many times the flavor that the smoke adds to the food is undesirable.
  • Hardwoods burn longer and provide more heat. They also provide more flavor because of the aromatic smoke produced while burning.
  • If you are using another fuel source such as charcoal, you can toss in wood in small quantities.  The flavor from the burning wood will add unique flavor to the food.

Woods that Should Not be Used

Some woods are better not to be used such as softwoods that can influence the flavor negatively.  However, some types of woods SHOULD NOT be used because they are hazardous.  Here are a few.

Lumber Scraps in General:  It is difficult to determine the type of wood in lumber scraps whether new or used, and, therefore, what effect it may have on the food. In addition, it is possible that used lumber could have come in contact with harmful substances that could be absorbed. It can pose a danger when burning.

Pressure Treated / Chemically Treated / Painted / Stained Lumber: Pressure- and chemically-treated woods are often used in projects such as outdoor decking.  Of course, paint and stain are used on many wood surfaces.  When these woods are burned, they release hazardous and releases toxic smoke and fumes.  At best, it will add undesirable flavor to your food. At worst, you are exposing your body to harmful substances.  Do not use these woods for grilling.

Mold or Fungus Covered Wood:  The smoke produced when mold and fungus are burned leaves a very undesirable tastes in food.

Popular Woods Used in Grilling

Sweet Flavor

  • Alder
  • Apple
  • Birch (smoky and sweet)
  • Blackberry
  • Cherry
  • Corncob:  The heart of the corncob can be ground into small granular bits that can be combined with other woods.  It can provide a sweet flavor that may overpower the food.  Start with small amounts and check until you get the desired flavor.
  • Grape Vine
  • Maple (smoky and sweet)
  • Mulberry
  • Peach
  • Pear

Smoky Flavor

  • Beech
  • Birch
  • Hickory (smoky bacon flavor)
  • Maple (smoky and sweet)
  • Pecan

Distinctive Flavor

  • Cedar
  • Mesquite
  • Oak
  • Pimento (peppery with possibility of flavors of other spices)
  • Seaweed (spicy, natural flavor)
  • Walnut
  • Wine or Whiskey Barrels


Grilling Safety Part 3: Gas Grills

Grilling Safety Part 3 - Gas Grills

A story was reported on NBC news a few years ago.  Julie was grilling hot dogs.  She looked outside and “saw 5-foot flames spewing from her family’s gas grill.”  Her friend emptied their kitchen fire extinguisher on the fire, but it didn’t stop.  She called 911 who advised her to wait until the flames died down and then shut off the propane.  Once the fire was out, she saw that the knobs and the shelf were melted off!

Julie was lucky.  She caught the fire before the tank blew up or anyone was hurt. It could have been worse.

Don’t let Julie’s experience happen to you.  Keep your outdoor barbecuing experience fun and reduce your risk with these tips.

Safety Checks

Many gas grill fires happen when using a grill that has been left inactive for a period of time.  They can also happen just after refilling and reattaching the gas container.  It is important to check them thoroughly.

Check your gas cylinder hose for leaks before your first use each year (or periodically if you use your grill year-round).

  • Bubble test:  Apply a light soap and water solution to the hose. A propane leak will release bubbles.
  • Smell test:  Pay attention for the smell of gas.

Check for blockages in the tubes that might be caused by insects, spiders, or food grease. If found, a pipe cleaner or wire can be used to push the blockage out of the tube.

Check for hoses in bad condition.  In addition to checking for leaks, look for any cracking, brittleness, or holes.  Ensure that any hoses or tubing have no sharp bends.

Position gas hoses properly.  Move them as far away from hot surfaces or where hot grease might drop.  If that is not possible, install a protective heat shield.

Check your connectors.  Replace any that are scratched or nicked.

If You Find a Leak or Break

If you find a gas leak, by smell or the soapy bubble test, and there is no flame, turn off both the gas tank and the grill. If the leak stops, get the grill serviced by a professional before using it again. If the leak does not stop, call the fire department.

If you smell gas while cooking, immediately get away from the grill and call the fire department. Do not move the grill.

Keep fire/heat sources away from a leaking grill.  This includes, but is not limited to, cigarettes, matches or any open flame.

Do not attempt repairs yourself.  Go to an LP gas dealer or qualified repair person.


Starting the Grill and While Cooking

Open the lid before turning on the gas — always!  Gas can build up inside a closed lid. If ignited, the lid can blow off and cause injuries and/or burns.

If the flame goes out while cooking, turn the grill and gas off and wait at least 5 minutes before re-lighting it.

Only use a grill outdoors. It should be at least 10 feet away from any building.  Do not use it in a garage, breezeway, carport, porch, or under a surface that can catch fire.

After Cooking

Completely close off the valve.

Store equipment correctly:

  • Your grill and propane tank should be stored outside and away from your house.
  • Flammable liquid (LP gas, gasoline, etc.) containers should be stored upright and away from the grill. Never store them indoors.
  • A filled gas container should never be kept in a hot car or car trunk.  Heat causes gas pressure to increase.  This causes the possibility of the relief valve opening and releasing gas into the vehicle.

Grilling Safety Part 2: Charcoal Grills

Charcoal Grill Safety

There is one time when you do not want your party to be a “blast” — when you are cooking on the grill.  In Part 1, we provided 5 general tips for grilling safety.  Here are some tips to stay safe when using a charcoal grill.

Prepping the Grill

  • Check for rust damage in metal grills. Charcoal can fall through holes and cause a fire.
  • The location of the grill and the items around it matter.
    • Do not place objects that can burn near the grill even after the flames are gone. The grill can continue to remain hot for many hours.
    • Keep combustible items that may be blown by the wind away from the grill.

Starting the Grill and Increasing Heat

  • There are several ways to get your charcoal started.
    • Charcoal chimney starters use newspaper as fuel.
    • If you use starter fluid, make sure you get charcoal fluid and do not add it when coals or kindling have already been ignited.
    • Electric charcoal starters to not use file to ignite your charcoal. When using an electric starter, be sure you have and extension cord for outdoor use.
  • If the fire needs to grow, use dry kindling or more charcoal. Liquid fuel can cause a flash fire.

Finishing Touches

  • About 50% of all grill-related injuries are thermal burns.  When you are finished grilling, let the coals completely cool before removing them.
  • Dispose of old coals in a metal container.
  • Store your leftover charcoal away from children and heat sources.

Grilling Safety Part 1: General Tips

Grilling Safety Series

Whether it’s in the backyard, tailgating or elsewhere, grilling seems to be one of life’s simple pleasures.  Unfortunately, there are potential safety issues as well. An average of 8,900 home fires each year are caused by grilling, 80% of them happening with a gas grill.  Here are tips to help you when protect yourself, your family and your home.

Do not leave the grill unattended.

Choose a safe location for your grill. They should be on a level surface and away from the house, garage or other structures. Be sure pets and children are kept away. Do not use them on a balcony, near objects that can catch fire (including your deck rails) or under overhangs or branches.

Only grill outside. Do not use it in a garage, tent or other enclosed space even if it is ventilated due to the risk of carbon monoxide buildup.

Pay attention in cold weather. On cold days, allow extra preheating time and check meat temperatures with a thermometer to make sure it is safe to eat.  Do NOT wear a scarf or loose clothing that can catch fire.  If it is windy, shield the grill and keep it at least 10 feet from anything combustible.

Keep children safe — at least 3 feet from the grill, especially those under 5 years old. 37% of grill-related burns seen at emergency rooms in 2014 were children under 5.

After Grilling

Keep your grill clean.  Remove fat or grease buildup on the grill and the trays underneath.

Dispose of coals properly.  When disposing of charcoals, soak charcoals thoroughly in water and dispose of them in a metal container.

If you are keeping the coals, the coals should be cooled.  Cover the grill tightly and close the vents. This should extinguish the coals and whatever is left will be ready for next time.